There is a particular kind of silence that settles over an account once a hedge goes on. The floating loss stops moving. The panic eases. You close the laptop and sleep properly for the first time in a week. And then, somewhere around day three, the real question arrives and refuses to leave: how do I actually get out of this?
If you are searching for how to exit a hedged position, you have already discovered the trap that nobody mentions when they recommend hedging as a rescue tactic. Opening the hedge is trivial. One click, opposite direction, same size, done. Exiting is the entire game, and it is where most people convert a frozen loss into a realised one, usually at the worst available price, usually within a fortnight of promising themselves they would be patient.
We see this constantly on the drawdown desk. Accounts arrive with a buy from 3,410 and a sell from 3,362 on gold, locked $4,800 apart, and the owner's first message is almost always a version of the same six words: which side do I close first? It is the right question. It just doesn't have a one-line answer, because the correct exit depends on four things you can measure and one thing you can't, which is your own discipline once half the hedge is off and the loss starts breathing again. This article walks through the framework we actually use: trend, structure, swap and margin, then three exit patterns built on top of them, then a full worked unwind so you can see the sequencing rather than just nod along to the theory.
Why hedge exits fail: the wrong side at the wrong time
Start with the uncomfortable arithmetic. A perfect hedge, same instrument, same size, opposite directions, freezes your equity. If you are locked $4,800 down, you will still be locked roughly $4,800 down next month, minus swap. The hedge does not reduce the loss. It stores it. Exiting means choosing the moment that loss comes back out of storage and starts moving again, and everything about the psychology of that moment pushes people toward bad choices.
Here is the classic failure, and if you have lived it, you are in large company. Gold has been falling. Your original position is a buy, deep underwater, and you hedged with a sell. Price keeps dropping for another week and the sell side accumulates a nice green number. It feels like the market is telling you something. So you close the winning sell to "bank the profit", congratulate yourself, and now you are sitting fully exposed in a naked losing buy at the exact bottom of a move that has been running for days and is statistically due to pause. Price bounces? Great, you got lucky. Price grinds lower, which is what trends usually do? Your locked $4,800 becomes a floating $6,500, you re-hedge in a panic at a worse level, and you now have two locks layered on top of each other and genuinely need professional help to read your own account.
The mirror-image failure is closing the loser first "to get it over with". That realises the full loss instantly and leaves you holding only the hedge trade, which was never a position you believed in. It was insurance. Now it is your whole account, pointed whichever way it happens to be pointed.
Both failures share a root cause: the exit was triggered by a feeling, either the itch to bank a green number or the urge to stop looking at a red one, rather than by anything the chart or the account was saying. The entire point of the framework below is to replace that feeling with a checklist.
First, map what the hedge is really doing
Before any exit decision, sit down with a coffee and write out the actual mechanics of your lock, because most people who are stuck in a hedge cannot state their own numbers from memory, and that alone tells you how the hedge went on: reflexively, not deliberately.
You need five figures on paper. First, the entry price and size of the original position. Second, the entry price and size of the hedge. Third, the gap between them in dollars, which is your stored loss. If you are hedged 1 lot against 1 lot on gold with entries 48 dollars apart, that is $4,800 locked, and no amount of staring changes it. Fourth, the net swap per day across both positions, which on a long-short gold pair is very often negative on both legs, meaning your stored loss quietly grows while you wait. Fifth, your current margin level percentage and, more usefully, how far price would have to run against your net exposure before the broker starts closing things for you. While both sides are on and matched, your net exposure is zero and margin barely moves. The instant you close one side, all of it comes back.
Then check whether your hedge is actually matched. A surprising number aren't. We regularly open accounts to find 1.4 lots of buys hedged with a 1.0 lot sell, because the hedge was added in pieces on different bad days. That is not a locked position, it is a 0.4 lot net long with extra steps, and it has been bleeding or earning with every move while the owner believed they were flat. Map it before you touch it. Net size, net direction, stored loss, daily swap cost, margin headroom. Five numbers on a sticky note. Everything that follows depends on them, and if the mapping stage reveals something you don't understand about your own account, that is worth resolving before the exit, not during it. Our FAQ covers a few of the common MT4/MT5 quirks people trip on here, hedging mode versus netting mode being the usual one.
One more honest note before the framework. Everything in this article is education, not personalised advice, and unwinding a hedge is live trading with real risk. The stored loss is real. Some unwinds end with a bigger realised loss than the lock showed. Anyone who tells you otherwise is selling something.
How to exit a hedged position: the four factors
Every exit decision we make on a locked account runs through the same four questions, in the same order. None of them alone gives you the answer. Together they nearly always point one way.
Trend. On the daily and four-hour chart, which direction is gold actually going? Not where you hope it goes, where the higher-timeframe swings say it is going. Higher highs and higher lows, or the opposite. This matters because the side of your hedge that agrees with the trend is the side with a future, and the side that fights it is the one you want to be rid of. If the trend is genuinely sideways, and gold spends a good share of its life chopping in $40-$80 ranges, that changes the whole approach, and staged exits at the range edges become the play.
Structure. Where are the levels that matter, relative to your two entries? Prior swing highs and lows, the round numbers gold respects far more than it should, zones where price has reversed twice before. An exit executed at structure is worth two executed in the middle of nowhere. If your losing buy is from 3,410 and there is heavy resistance at 3,395, that resistance is where the losing side gets reassessed, because the odds of price stalling there are meaningful.
Swap. What is the lock costing you per night, and what does that annualise to? A dollar or two a day on a small position is noise; ignore it. Fifteen dollars a night on a larger gold hedge is over $5,000 a year, and it quietly converts "wait patiently for the perfect exit" from a strategy into a slow puncture. Heavy negative swap pushes you toward faster, staged exits. Neutral swap buys you the luxury of patience.
Margin. When one side comes off, the full exposure of the other side lands on your margin at once. Before closing anything, calculate your margin level as if the exit had already happened, then ask how many dollars of adverse movement you can absorb after that. If the honest answer is "about $900 before a margin call", you do not have the headroom for any exit plan that involves holding a naked position through noise, and that constraint overrules everything the chart is telling you. Margin is the veto-holder among the four. The other three factors vote; margin can overrule them all.
Rough weighting, if you want one: trend tells you which side survives, structure tells you where to act, swap tells you how fast you must move, margin tells you how much you may hold unhedged at any moment.
Scenario A: closing the losing side first
This is the exit people resist hardest, because it means pressing a button that turns a floating loss into a bank statement entry. It is also, in a trending market, very often the correct one.
The setup: gold is in a clean downtrend on the daily. Your original position is the buy, now $4,800 underwater. Your hedge is the sell, opened later, currently flat or slightly green. Trend says the sell is the side with a future. Structure gives you a specific trigger: price pulls back up into a resistance zone, say a prior support at 3,388 that should now act as a ceiling, and stalls there.
That stall is your moment. You close the losing buy into the pullback, realising the loss at the best price the market has offered in days, and you keep the sell. Now you are short, alone, with the trend at your back. The sell's job changes from insurance to recovery vehicle: every dollar gold falls from here is a dollar clawed back against the realised loss. You put a proper stop on it, above the resistance that triggered the exit, because it is now a real position and real positions have stops. If the downtrend delivers another $30-$50 leg, the sell earns back a meaningful slice of what the buy cost you.
Why close the loser into a pullback rather than immediately? Because the pullback improves your realised price on the buy by whatever the bounce gave you, sometimes several hundred dollars on a 1 lot gold position, and simultaneously offers the sell a low-risk continuation entry point. You are using the market's own rhythm to subsidise the exit.
The failure mode to respect: the "pullback" keeps going and turns out to be a reversal. This is why the surviving sell carries a stop, and it is why you sized the whole manoeuvre against your margin headroom first. If the reversal is real, you take a small further loss on the sell and you are out of the entire mess, flat, bruised, alive. That outcome, a fully realised loss somewhat smaller than the original lock, is not a failure. It is the median good result of a hedge unwind, and anyone promising you better than that every time has never actually done this.
When A is wrong: when there is no trend. Closing the loser in a sideways chop just realises the loss without giving the surviving side any edge, and the chop will stop you out of the survivor for an extra bite. In a range, look at Scenario C instead.
Scenario B: closing the winning side first
Everything in retail trading psychology screams for this one, which should make you suspicious of it. But there is a legitimate version, and it is worth stating precisely because the illegitimate version is so common.
The legitimate setup: the winning side of your hedge is the one fighting the higher-timeframe trend, and it is in profit only because of a countertrend spike that is now exhausting into major structure. Concrete case: the larger trend is up, your original underwater position is the buy, your hedge sell went green during a sharp three-day correction, and that correction has just landed on the daily support shelf at 3,320 that has held twice since March, where the selling is visibly drying up.
Here, closing the winning sell is not "banking profit". It is removing the side with no future at the point where its future looks worst. The banked profit from the sell gets mentally applied against the stored loss, shrinking the effective lock. And the surviving buy, still underwater, is now aligned with the trend and sitting just above the exact support where buyers have twice shown up in size. If the support holds and the uptrend resumes, the buy's floating loss shrinks with every leg up, and you exit it in stages into resistance, or hold it back to breakeven if the move is generous. Gold has repaired worse. A $48 gap on a trending market is two good weeks, not a life sentence.
The discipline that makes B survivable is the same one that makes A survivable: the moment the hedge comes off, the survivor gets a hard stop. In this case, below the 3,320 support with enough room to breathe, maybe 3,308. If support breaks, you are out of the buy, the whole position is closed, and your total realised damage is the original lock minus whatever the sell banked. Painful, defined, over.
The illegitimate version, for contrast: closing the winner purely because it is green, with the trend still pointed against your survivor. That is the classic failure from earlier in this piece, dressed in a plan's clothing. The tell is simple. If you cannot name the structural level that makes the winning side's continued survival unlikely, you are not executing Scenario B, you are just harvesting dopamine, and the market charges heavily for that.
One honest caveat on both A and B: they each involve a period of naked exposure, and naked exposure can lose money faster than a lock ever did. Margin factor first, always. If the post-exit margin maths doesn't leave you room for at least a normal day's gold range, roughly $30-$60 these days, against your naked side, neither scenario is available to you at full size. Which brings us to the one that usually is.
Scenario C: staged exits on both sides
Most real unwinds we run are not one clean decision. They are six or eight small ones, spread over two to five weeks, and the reason is that staging attacks the hedge's stored loss from both ends while never leaving the account fully exposed.
The mechanics, assuming a 1 lot buy hedged by a 1 lot sell. Instead of treating the hedge as one unit, you treat it as ten units of 0.1 against ten units of 0.1, and you peel. When price rallies into a resistance level, you close 0.2 or 0.3 of the losing buy there, realising a slice of the loss at a good price, and you are now slightly net short into a ceiling, which is a defensible position. When price rotates down into support, you close a matching slice of the sell, banking a slice of hedge profit at a good price, returning to flat or slightly net long into a floor. Each rotation of the range shaves the position smaller and converts a piece of the frozen loss into either a realised loss taken at favourable prices or a banked gain that offsets it.
Three rules keep staging honest. First, slices only get closed at levels, never in the middle of the range, never because a day felt scary. If price sits mid-range for a week, you do nothing for a week. Second, your net exposure never exceeds a ceiling you set in advance from the margin factor, we typically cap it at 20-30% of the original position size, so a 1 lot lock never becomes more than a 0.3 lot naked bet at any moment. Third, the slices come off on a schedule of levels, not a schedule of dates. Calendar-based unwinding ("I'll close a bit every Friday") is just averaging your exit into random prices, and you can get the same result cheaper by closing everything today.
Staging has real costs, and pretending otherwise would be marketing. You pay the spread on every slice, ten extra tickets instead of two. Swap keeps ticking on whatever remains hedged, so a heavily negative-swap lock punishes slow staging. And a strong breakout from the range can catch you mid-peel, slightly net the wrong way. But for a locked account without a clear trend to lean on, it is the approach that best matches how gold actually moves, in rotations, and it is forgiving of imperfect reads in a way the all-at-once exits are not. Get one slice wrong and you have mispriced 0.2 lots, not your whole account.
Using new momentum to pay for the exit
There is a more active variant that deserves careful, slightly wary treatment: adding a third, fresh position whose profits fund the unwind. Done coldly, it can shorten a recovery by weeks. Done the way most people do it, it is how one lock becomes a nest of them, so read this section as a description of a power tool, guard fully attached.
The idea. Your hedge stores a $4,800 loss. Rather than waiting for perfect exit levels on the locked pair, you trade small, independent setups in the direction of the current momentum, and every realised profit from those trades gets used, immediately and mechanically, to close a slice of the losing side. A fresh 0.2 lot short catches a $15 fall in gold and banks $300; that $300 pays for realising $300 of the stored loss the same day, and the lock shrinks. The new trades are the income; the unwind is the expense they fund.
What makes the disciplined version disciplined is separation. The momentum trades are normal trades: they have their own entries at their own setups, their own stops, their own sizing at somewhere near 0.25-0.5% risk, and they would make sense on an account with no hedge on it at all. The moment a "recovery trade" only makes sense because you are desperate to shrink a lock, it is not a trade, it is a bet with a story, and its stop will mysteriously fail to get honoured. We have opened enough rescue accounts to say this plainly: the third-position tactic executed emotionally is the single most common way a $5,000 problem becomes a $9,000 problem. The trades get sized too big, because bigger trades shrink the lock faster. Then one of them loses, as trades do, and now there are three positions underwater and the owner is considering a second hedge on the new one.
So the rule we run: momentum trades against a locked book are capped at a quarter of the locked size, carry hard stops from the first second, and their profits are spent on the unwind the day they are banked, not left to "run into something bigger". If you cannot honestly commit to all three, skip this section's tactic entirely and stage the exit the slow way. The slow way works. It is just slower, and slower is a fine price for safer when the account is already wounded. This distinction between mechanical process and hopeful improvisation is, incidentally, most of what separates recoveries that work from ones that don't, and it is the same distinction we drew in what a losing streak actually does to your decision-making.
The worked example: a $7,400 locked hedge unwound
Theory is tidy. Accounts are not, so here is a composite, anonymised but faithful to the pattern we see most, of a full unwind from start to finish. Call the owner Sam. The numbers are illustrative, not a promise of anything.
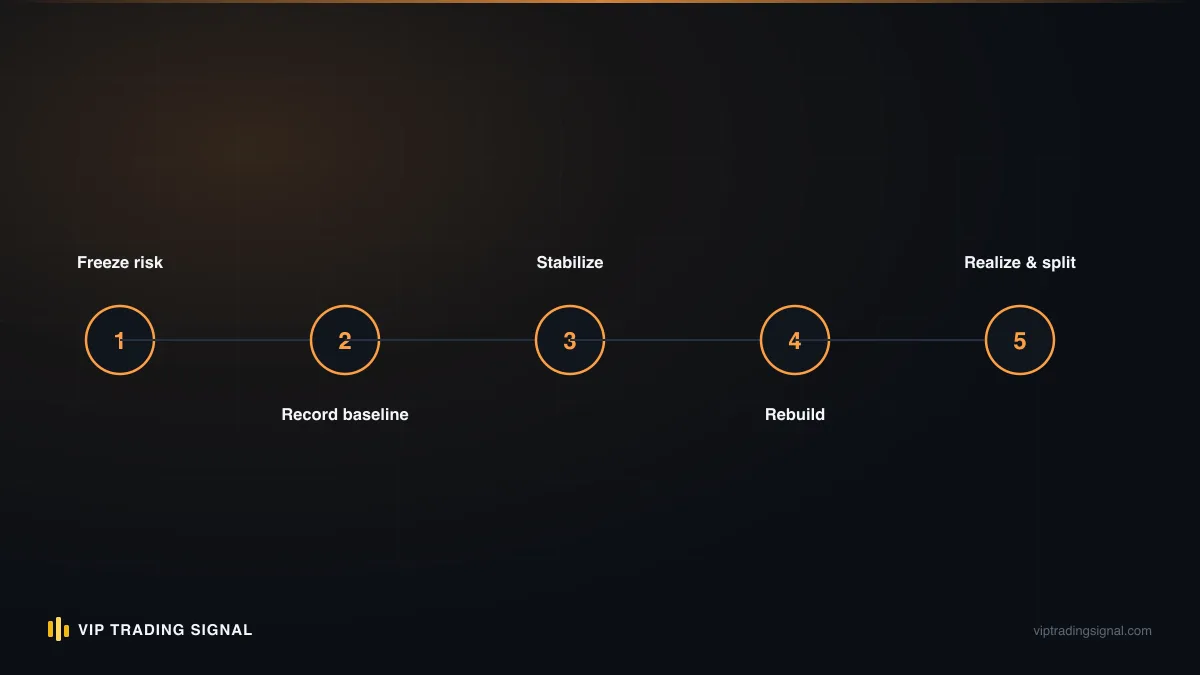
Sam arrives with a $21,000 account floating $7,400 down. The wreckage: 1.5 lots of gold buys, averaged in at an effective 3,415 during a fall (three separate "it must bounce here" entries, a familiar biography), hedged late with 1.5 lots of sells from 3,366. Gap: about $49, times 1.5 lots, near enough $7,400 stored. Net swap: about minus $11 a night, so the lock costs roughly $330 a month to hold. Margin is adequate while hedged, but the maths says a fully naked 1.5 lot side leaves room for only about $55 of adverse movement before things get tense. That single number rules out Scenarios A and B at full size before a chart is even opened. This will be a staged unwind, with a momentum overlay if setups appear.
The read: daily trend down but decelerating, four-hour building a range roughly 3,340 to 3,392, hard support at 3,320 below, prior shelf at 3,405 above. The plan gets written down and, this matters, agreed before anything is clicked: losing buys peel in 0.3 lot slices at 3,385-3,392, winning sells peel in 0.3 lot slices at 3,342-3,348, net exposure capped at 0.4 lots, everything stops and gets reassessed if 3,320 breaks or 3,405 reclaims.
Week one, price tags 3,390. Slice one of the buys is closed, realising about $750 of loss at the best price in three weeks. Now net short 0.3 into resistance. Price rotates down over four sessions to 3,345; slice one of the sells is closed there, banking roughly $630 of hedge profit. Back to flat, lock now around $6,900 realised-plus-stored, position down to 1.2 v 1.2. Week two offers nothing; price sits mid-range and Sam, to his enormous credit, does nothing with it. Week three delivers both edges again, and a small 0.3 lot momentum short from a clean lower-high at 3,388 adds $540 of banked profit, spent the same day realising another buy slice.
It takes just under five weeks and eleven tickets. Final tally: total realised loss on the buys about $6,100, offset by roughly $2,850 of banked sell and momentum profits, for a net realised loss near $3,250 against the original $7,400 lock, plus about $400 of swap and spread costs along the way. Sam's account finishes flat, no positions, roughly $17,300, wounded but functional. Not a triumph. A $3,650 loss never is. But it beats the two default endings, panic-closing the whole lock for the full $7,400 or holding it while swap ate the account, and it beat them because every click happened at a level chosen in advance.
Mistakes that turn one lock into two
We keep an informal list on the desk of the ways hedge exits go wrong. The same five items have topped it for years.
Re-hedging the survivor at the first wobble. You close one side, price moves $12 against the naked survivor, the old fear returns, and you slap a fresh hedge on. Now you have realised part of the old loss and built a new lock at a worse gap. Two locks, one account, morale gone. The fix is deciding, before the exit, exactly what adverse move you will tolerate on the survivor, and putting a stop there instead of a new hedge. A stop ends the story. A hedge extends it at interest.
Unwinding without writing the plan down. Every level, every slice size, every abort condition, on paper before the first click. Not because paper is magic, but because the person who wrote the plan on a calm Sunday is smarter than the person watching a red candle on Wednesday, and the written version lets Sunday-you outvote Wednesday-you.
Ignoring swap until it has eaten the cushion. A lock costing $11 a night has cost you a decent used car by the time "waiting for the perfect exit" has run eighteen months. If your swap is heavily negative, patience is not free and your plan needs a clock on it.
Trading the range mid-range. The urge to do something every day is the enemy of an exit that only offers two good zones a week. Most of a good unwind is waiting. It is genuinely boring, and it is supposed to be.
Trusting a stranger who promises to unwind it for you, guaranteed. Locked accounts attract predators, because the owner is stressed and the loss is visible. Anyone guaranteeing recovery of a hedge is lying, full stop, and we say that as a company that unwinds hedges commercially. We wrote at length about separating real account management from the Telegram variety in is forex account management legit, and the short version is: master password stays with you, fees on results only, and no guarantees of anything, ever.
The hedge stores the loss; the exit spends it. Your only real control is choosing the prices at which it gets spent.
That is the whole discipline in one line, honestly. Everything else in this article is machinery for choosing those prices well.
When to bring in an outside manager
Most hedged accounts do not need professional help. Read that again, because it is not the sentence you expect from a firm that sells drawdown recovery. If your lock is modest relative to the account, your margin maths gives you room, and you can follow a written staging plan without improvising, the framework above is genuinely enough, and doing it yourself teaches you things about your own discipline that are worth more than the fee you save.
There are three situations where handing it over starts to make sense. First, complexity: when the "hedge" is actually five partial positions across different entries in both directions, possibly with a second instrument involved, and you can no longer state your own net exposure without a spreadsheet. Second, margin fragility: when the headroom maths says any naked exposure risks a margin call, so the unwind has to be sequenced tightly around events and sessions, which is a full-time babysitting job. Third, and most common, the honest self-assessment: you know the plan, you have watched yourself break plans like it twice already, and the pattern will repeat because the person executing is the same person who built the lock.
For what it's worth, here is how we structure it, so you can compare anyone you talk to against something concrete. Our drawdown management service takes accounts floating roughly $5k-$10k down, we trade on your own MT4/MT5 account, you keep the master password and full control of withdrawals, and the fee is a flat 50% of recovered profit above a baseline we record together on day one. No recovery, no fee, and no guarantees either way, because the market does not sign contracts. Fifty percent is the high end of the industry, we are upfront about that; the trade-off is a low entry point and pay-as-you-go with nothing owed on failure. Whether that trade suits you is your call, and asking us hard questions before committing to anything is the correct order of operations. Ask any prospective manager the same three: who holds the password, what exactly is the baseline, and what do I owe if this fails. Wrong answers to any of them end the conversation.
And if you go it alone, one structural suggestion: recruit a witness. A trading friend, a partner, anyone you must message before deviating from the written plan. The unwind failures we see are almost never analytical. They are one person, alone with a terminal at 11pm, renegotiating with themselves.
Where this leaves you
If your account has a hedge on it right now, close this tab in a minute and do the mapping exercise first: net size, net direction, stored loss in dollars, swap per night, margin headroom after a one-sided exit. Five numbers. Until they are written down, every exit idea you have is a mood.
Then run the four factors without flinching. If there is a real trend, the side fighting it is the side that goes, at structure, into a pullback, with a stop on the survivor from the first second. If there is no trend, you are staging: slices at the range edges, a hard cap on net exposure, and mid-range days off. If swap is bleeding you, the plan gets a deadline. If margin vetoes naked exposure, margin wins, and you stage small or you get help, because "hope the broker doesn't notice" is not a plan.
Above all, make peace with the ending before you begin. A good hedge exit usually finishes with a realised loss, smaller than the lock, taken at prices you chose. That sentence disappoints everyone the first time they read it, and we would rather disappoint you here than mislead you into hunting for the exit that costs nothing, because that hunt is precisely how people stay locked for a year while swap does its quiet work. The trader who accepts a $3,000 realised loss on a $7,000 lock and moves on has, in every way that matters, beaten the trader still "waiting for the right moment" fourteen months later. Same lock. Different endings. The difference was never the market, and if you have read this far, you already know whose click it was.